Tensile Testing

Tensile testing is one of the most useful mechanical tests available because of its ability to measure several material properties in a single test. The insights gained from tensile testing can be used to characterize properties in the development of new materials, verify the quality of established materials and to reference material properties data for use by designers. The test is used across the whole spectrum of manufacturing, from material suppliers to parts manufacturers in industries such as metals, papers, plastics, ceramics and more.
Sample Preparation & Testing
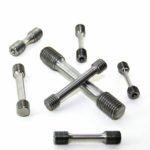
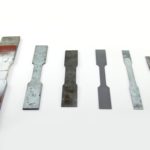
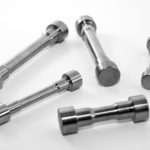
The tensile test involves manufacturing a dog-bone shaped sample that is either flat or round. Appropriate ends are machined into the sample so that they may be gripped by the tensile test machine. Specific details can be found in ASTM E8 or DIN 10002-1. The prepared sample is then mounted in the test frame and pulled from the ends at a constant rate until separation into two pieces. Instantaneous stress (load divided by the original cross-sectional area) and strain (change in specimen length divided by the original length) are continuously recorded. Load is measured by a load cell while length is measured by an extensometer attached to the specimen’s midsection.
Initially, stress and strain change at rates that are proportional to each other, producing a linear graph when plotted on X and Y axes. The slope of the linear portion of the tensile curve is the stiffness or modulus of the material.
At some point, strain begins to increase faster than stress; at this point, the material has reached its proportional limit. If the specimen were unloaded, it would be found to be longer than its original length. When the change in length reaches a specific point (i.e. 0.2% of its original length), the test has reached its offset yield strength. The test continues until the sample breaks.
The maximum stress achieved during the test is the material’s ultimate strength. The elongation is the permanent change in length or deformation of the sample as measured from dimples or punch marks placed on the specimen’s midsection before testing or from the extensometer’s reported plastic strain at break. The change in cross-sectional area from the original area to the area after break is reported as the reduction in area. Elongation and reduction in area are a measure of a material’s ductility.
The typical tensile properties reported in English units are:
- Modulus (Stress/Strain, Mega pounds per square inch or Mpi)
- 0.2% Offset Yield Strength (Load at Yield/Original Cross-sectional area, Pounds per square inch or Psi)
- Ultimate tensile strength (Maximum Load/Original Cross-sectional area, Pounds per square inch or Psi)
- Elongation (Percent change from original midsection length)
- Reduction in area (Percent change from original cross-sectional area)
Other properties, such as true stress and strain, upper and lower yields, EUL (extension under load.)
R Value (a measure of formability of sheet metal), N Value (a measure of strain hardening of a material) and more are also available. Additionally, ultimate tensile strength may be used to correlate hardness in carbon steels.
Typically yield strengths are most useful to a designer. Material choices along with part dimensions are specified so that yield strengths are not exceeded, which would result in permanent deformation of the part. Modulus can be equally important in that it can be used to calculate how much a part will deform under a giving load.


