Mechanical Testing
Common Mechanical Test Methods Performed in the Laboratory:

The mechanical properties associated with a material can be either intrinsic or modified in some manner to meet the requirements of a particular application. It is the laboratory’s job to measure a certain mechanical property such that the material can be deemed acceptable for the engineered application.
Mechanical properties are numerous, however, we can concentrate on the following mechanical list and methods that are routinely performed in the laboratory:
- Tensile Strength-The amount of strength it takes to break a specimen under pull or tensile stress (ASTM E8, ASTM E8, ASTM A370, SAE J995, JIS Z2201, JIS Z2241)
- Yield Strength-The amount of strength it takes to plastically deform a material under pull or tensile stress (ASTM E8, ASTM A370, SAE J995, JIS Z2201, JIS Z2241)
- Ductility (Measured as elongation and reduction of area)- The measure of the amount a material can “stretch” before break under pull or tensile stress (ASTM E8, ASTM A370, SAE J995, JIS Z2201, JIS Z2241)
- Modulus of Elasticity-The ratio of stress to strength in the elastic region under pull or tensile stress (ASTM E8, ASTM A370, SAE J995, JIS Z2201, JIS Z2241)
- Plastic strain ratio (Measured as “r” value)-The ratio of axial strain to transverse strain under pull or tensile stress used as an indicator of “formability” (ASTM E517)
- Work Hardening Exponent (Measured as “n” value)- The measure of the point at which transverse strain occurs under pull or tensile stress also used as an indicator of “formability” (ASTM E646)
- Impact Strength (Measured as charpy impact energy)-The energy absorbed under a high energy concentrated impact load (ASTM E23)
- Surface Roughness-The measure of the variability in the surface texture or distance between peaks and valleys at the surface (ASTM D7127)
- Hardness Measurements -The measure of a material’s ability to resist deformation or scratching. Many hardness measurements and techniques are available, however the technique used is typically governed by the range, geometry, or homogeneity of the material:
- Rockwell Hardness– Generally the most utilized hardness measurement using typically a pointed indenter under load and measures “depth” of penetration. (ASTM E18)
- Brinell Hardness– A ball type indenter is used under load and measures the diameter of the indentation. (ASTM E10)
- Macro Vickers – A square pointed indenter under a high load and measures the planar dimensions of the indentation (ASTM E72)
- Micro Vickers – Same as Macro Vickers except with a much lower load utilized to measure coatings or changes in hardness through a sample cross-section (ASTM E384)
- Knoop Hardness – Same range and use as Micro Vickers except a flatter indenter is used to yield a reduced indentation in one direction (ASTM E384)
Additional Mechanical Properties:
In addition to the above list, other mechanical properties may be needed or utilized to characterize a material property and may include:
- Bulk Modulus – The measure of compressive strength (pressure) to volume change
- Coefficient of Friction – The measure of how “slippery” a surface is
- Fatigue Strength – The measure of a materials limit to break under periodic or alternating stress
- Flexural Strength – The measure of a materials resistance to bending under transverse loading
- Specific Gravity – The measure of a materials weight to volume ratio
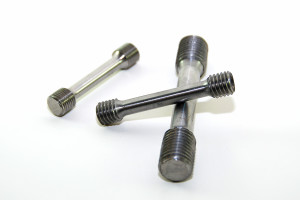
The geometry and configuration of the specimens for testing is often governed by the testing specification and thus is prepared in the laboratory by extracting, machining, or forming from the submitted sample. The specification should be consulted for the minimum sample size requirements or simply contact the laboratory with the relevant sample information to determine feasibility in testing.

