Cleanliness Testing
Now offering large part cleanliness testing services, including crankshaft and axle assemblies, performed in a cleanroom environment

In today’s high precision manufacturing environments, supplying of ultra-clean components is often paramount to performance and reliability of finished goods. The transportation and medical devices sectors have been at the forefront in assessing the critical levels, sizes, and compositions of part surface contaminants, manufacturing residues, and packaging and handling artifacts. In particular, assembly of automotive and aircraft powertrain systems involves often times hundreds of different individual components that may be directly in a fluid or forced air path for which downstream contamination can be detrimental to long term systems health and performance.
Parts Cleanliness Testing: Standards and Assessment
The automotive and aircraft OEMs (Original Equipment Manufacturers), continue to develop component cleanliness standards based around industry standard techniques and technologies that put the onus on the supplier to meet or exceed critical surface cleanliness requirements. These levels are routinely assessed and defined per the specific needs of the final assembly requirements. Unfortunately or fortunately, each particular manufacturer continues to develop their own standards based upon the criticality of the systems (and often times the specifications are systems specific). What is “standard”, however, are typically the assessment methodologies and techniques employed in which assess the surface cleanliness levels.
We can break down the parts cleanliness assessment into three generic descriptions of their function. All three areas are typically part of a comprehensive parts cleanliness assessment; however, some areas are not specifically addressed in some of the cleanliness standards. These descriptions are defined as 1) surface residues isolation, 2) surface residues measurement, and 3) surface residues characterization. On a side note, some will note the early incarnation of such testing as “Millipore testing” or “Millipore patch test” named for the filtration manufacturing company Millipore that supplies a lot of the standard filter media as well as filtration and cleaning apparatus.
Cleanliness Testing Specifications
The primary reference specifications which address the cleanliness descriptions described above are as follows:
- ISO-4405 – Determination of particulate contamination by the gravimetric method
- ISO-4406 – Method for coding the level of contamination by solid particles
- ISO-4407 – Determination of particulate contamination by the counting method using an optical microscope
In addition, the following specifications have found their way into many OEM specifications as the primary reference standards and thus the road to standardized reporting across the industry is beginning to be paved:
- ISO 16232-2 – Method of Extraction of contaminants by agitation
- ISO 16232-3 - Method of Extraction of contaminants by pressure rinsing
- ISO 16232-4 – Method of Extraction of contaminants by ultrasonic techniques
- ISO 16232-5 – Method of extraction of contaminants by functional test bench
- ISO 16262-6 – Particle mass determination by gravimetric analysis
- ISO 16232-7 - Particle sizing and counting by microscopic analysis
- ISO 16232-8 – Particle nature determination by microscopic analysis
- ISO 16232-9 – Particle sizing and counting by automatic light extinction particle counter
- ISO 16232-10 – Expression of results (CCC coding)
Surface Residues Isolation:
The first step to any cleanliness assessment is to isolate the surface residues from the particular component (or area of the component). The different standards will specify the techniques “allowed” to isolate the residues, but generally will involve exposure of the particular surface to a particular fluid that has been defined to have specific detergency for the specific residues. These are often organic solvents or aqueous fluids with surfactants and are specifically called out in the cited specification. The methods of exposure generally are either: a) immersion, b) ultrasonic cleaning, or c) pressure washing. For specific passages of a component, pressure washing is normally specified as it is efficacious to target a fluid stream to a particular passage. Again, the method of exposure and parameters are typically specified in the cited standard. The fluids that are collected from the exposure and are ready for the next step in the assessment process.
Surface Residues Measurement:

Although some specifications will assess the needs to measure any particular surface residue isolated, the overwhelming majority of the specifications deal specifically with “particles”. A particle being defined as a suspendable solid greater than a certain nominal size (often expressed in microns or micrometers).
The typical method for assessment of particle level is to isolate from the collected fluid by filtration.
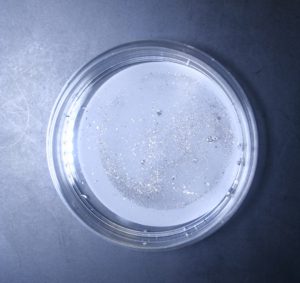
The cited specification will typically define the lowest particle size relevant for analysis by defining the “pore size” of the measurement filter, of course paying careful attention to the compatibility of the filter media with the exposure fluid. The blank filter tare weight is determined, the exposure fluid is passed through the filter (typically by vacuum filtration), the filter system rinsed and dried, and finally the filter weight differential is determined.
At this point, a total particulate weight (greater than the filter nominal pore size) can be reported, however most specifications will normalize this value to the particular surface area exposed (i.e., milligrams per 1000 square centimeters), therefore knowledge of the exposure surface area is required, either by direct geometrical calculation, or ideally from the component engineering drawings when complex geometries are associated with the exposure.
Generally, measurement through this step is often referred to in the industry as “The Millipore Patch Test”, named for the filtration supply company. The processed filter pad can then be further assessed for debris field particle sizing using microscopic measurement methods

For specifications where particle mass is not deemed relevant to measurement, light scattering systems are typically used that can process the collected fluids without the need for filtration for particle sizing. These measurement systems can typically characterize a wide range of particle sizes and ranges fairly quickly and normalize to the volume of fluid processed.
Surface Residues Characterization:
With a processed filter with debris field in hand, the cleanliness specifications may require further characterization of the debris field which can include characterizations such as largest particle size, total particles greater than a certain size, total “hard” particles greater than a certain size, or composition of particles greater than a certain size.
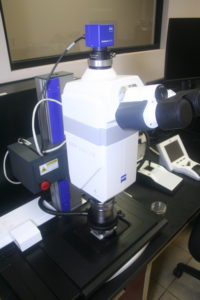
Depending on the complexity of the specification, different techniques are called out for characterization, however most will require microscopic observation, sizing, and morphological characterization which will require analytical expertise in the characterizations. In addition, based on the scarcity of the debris, total filter observation may be required, or statistical sampling. Composition characterization can often be performed using more sophisticated optical microscopic methods (and expertise in morphological characterizations), however elemental composition analysis of the individual target particles can be accomplished using SEM (Scanning Electron Microscopy) and EDS (Energy Dispersive X-ray Spectroscopy), or for organic particle characterizations, FTIR (Fourier Transform Infrared) spectroscopy and microscopy.
As mentioned previously, the cited ISO standards are the general procedures for part and fluid cleanliness analysis, however most of the cleanliness procedures performed in the laboratory are based upon OEM specifications. Some of the more comprehensive OEM procedures and specifications are detailed below.
- STD 107-0002 – Volvo powertrain component cleanliness standard
- DBL 6516 – Daimler Benz standard (gravimetric, sizing and composition)
- VDA 19 – Comprehensive German cleanliness specifications for automotive industry
- ZF 701 – ZF Transmission component cleanliness standard (gravimetric, sizing, composition)
- AAM – American Axle standard series specific to driveline components (comprehensive)
- ISO 16232 – Cleanliness requirements for fluid systems
- Caterpillar 1EXXXX – Caterpillar powertrain component cleanliness specifications
- GMW 16037 – General Motors Cleanliness of Powertrain Components
- AITM6-3002 – Airbus hydraulic systems cleanliness
- TSES 1338 – Borg Warner systems cleanliness
- ES5L2P-7W092-AA – Ford Motor Company Engineering cleanliness specification
- 84A214647 – General Electric Diesel Component cleanliness
The above list represents the typical cleanliness specifications routinely performed in the laboratory, however it is not all inclusive. Every major transportation OEM and tier 1 supplier has component cleanliness standards that the laboratory can likely perform upon specification review.
Cleanliness Testing Links:
View a guide to understanding your cleanliness testing report

